Back to TheWorxHub for Senior Living Main Menu
Adding Inventory Items
You can add Inventory items to your WorxHub account to associate to work orders.
Watch the Video Tutorial:

How to Add Inventory Items
To add a new Inventory Item:
- Click Add at the top of your screen, then select Inventory Item.
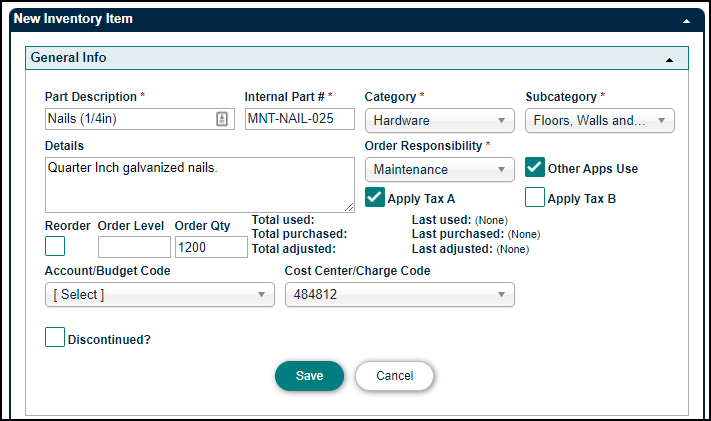
General Info
- Enter a Part Description. This will serve as the identifier in the list of all inventory items.
- Enter an Internal Part #.
- Select a Category and Subcategory from the pick lists.
- Select an Application from the Order Responsibility drop down menu.
- Enter any additional information needed in the Details field.
- If you would like the system to keep track of items that need to be reordered, check the box underneath Reorder.
- Enter an Order Level. This is the threshold below which TheWorxHub will identify this item as needing to be reordered.
- Enter an Order Qty to tell TheWorxHub how many units should be ordered at a time.
- If applicable, select the Account/Budget Code associated with this item from the pick list.
- If applicable, select the Cost Center/Charge Code associated with this item from the pick list.
- Click Save.
Storage Location
- Once you click Save, you can begin entering storage and quantity information for the inventory item by clicking Add storage location.
- In the pop-up window, use the Storage Location search field to either type and select the name of the location, or click the Location Picker (
 ) to select the appropriate location from the list.
If there are additional storage areas you would like to add, you can do so by adding them to the Bin/Shelf pick list under your pick list settings.
- Select the applicable Bin/Shelf from the pick list, then click Save.
- Click the Adjust link to the right of the Storage Location record to open the Adjust Inventory pop-up window.
- Enter the current on-hand quantity in the New On Hand field, and type a Reason for Quantity Adjustment, such as "Initial On Hand Count".
- Enter the part cost in the New Unit Cost field, and type a Reason for Value Adjustment, such as "Initial Price Listing".
- Click Save.

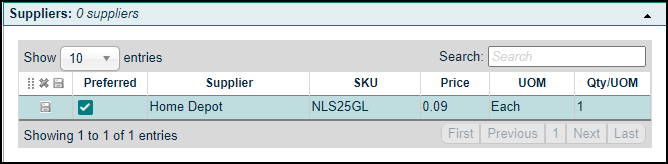
Suppliers
- Click on Suppliers to expand that panel. To learn more, see Adding Suppliers.
- Double-click on the Supplier field to select an option from the pick list.
- Click on the SKU text box and enter the SKU number associated with the part.
- Click on the Price field to enter that supplier's price for the item.
- If necessary, edit the UOM (Unit of Measure) and Qty/UOM (Quantity per Unit of Measure) for this supplier by clicking on those fields.
Attachments
In this section, you can add any attachments from your computer, the web, or from a Dropbox account.
- Click on Attachments to expand this panel.
- Click the Add Files link.
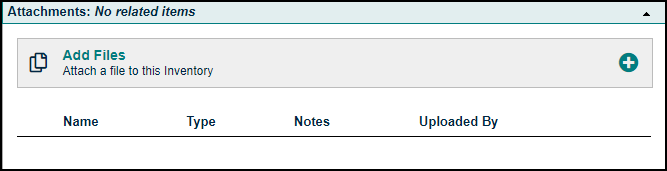
- The File Selection window will display a list of files recently uploaded to the File Library.
-
Use the Search field to search for additional files.
-
Check the box for any file you would like to attach to the inventory item, then click the Add Files button.
-
If the file does not currently exist in the library, click the +New File button to attach the file to the inventory item.
-
In the window that appears, choose the source of the attachment. *Note: If a new image or document is attached to the project, it will also be uploaded to the File Library.
-
Select Choose File to upload a file from your computer.
-
Select Dropbox to link to a file in a Dropbox account.
-
Select URL to enter a link to a document or file on a web page.
-
-
If you have selected the wrong file, click the Remove link and repeat this process to select the correct file.
-
Enter a note or description of the file in the optional Notes field, then click the Add Files button.
Log
- Click on Log to expand this panel. In this section, you can view any changes or additions made to the template such as status changes, notes, or comments.
- To add a note to the Log, click on New Note.
- Enter the details of the note in the text field, then click Save.

You can also add inventory items by utilizing the Add Ad-Hoc Item feature on a purchase order. See Adding Purchase Orders for more information on this feature.
